James Thomas

Notes on software.

Capturing Runtime Metrics for OpenWhisk Applications

This blog post is part one of a series on “Monitoring Serverless Applications Metrics”. See the introduction post for details and links to other posts.

Serverless platforms pose a unique challenge for collecting application metrics. Runtime environments are ephemeral, existing only to process requests.

Using a background process to capture and export metrics to an external service is impossible. With such a restricted runtime environment, we have to look at other options… 🤔

exporting serverless runtime metrics

console logs with alarm trigger

Apache OpenWhisk captures console logs written to stdout or stderr by actions. Logs are available in activation records through the platform API.

Runtime metrics written to the console will be saved in the activation records.

An additional action, triggered from the alarm package, can be scheduled to collect these values from the logs and forward to the metrics service.

This approach is simple and does not interfere with request processing. However, it does add a delay to the metric values being available in the collection service. This delay is dependent on the schedule chosen for the alarm trigger feed.

send before returning

Another option is to instrument the serverless functions to automatically collect and push metrics to the metric service before returning from the function.

The function will have to wait for the external metrics service to respond before returning.

This method pushes metric values into the collection service in real-time. There is no waiting for the background collection action to run. The disadvantage of this approach is that it adds a delay to each request. This delay is dependent on the response time from the collection service.

capturing runtime metrics

Metric values will have to be captured using a runtime library, due to the restrictions on running background processes.

The library should automatically capture registered metrics during each invocation. Values will be forwarded to the collection service using the configured forwarding method.

openwhisk-metrics

There is a Node.js library to ease the process of capturing runtime metrics for OpenWhisk actions.

https://github.com/jthomas/openwhisk-metrics

Node.js actions are wrapped with a proxy to automate recording metrics during invocations.

Metric values for cpu, memory, time, error and coldstart are collected by default. It supports adding custom metric collectors.

usage

Wrap action handlers with the metrics library.

1
2
3
4
5
6
7
const metrics = require('openwhisk-metrics')

const main = params => {
  return { message: "Hello World" }
}

module.exports.main = metrics(main)

Metrics values are logged to stdout for each invocation of the serverless function.

1
2
3
4
5
6
7
8
9
10
11
METRIC <workspace>.<action_name>.<activation>.memory.rss 53018624 1512489781
METRIC <workspace>.<action_name>.<activation>.memory.heapTotal 34463744 1512489781
METRIC <workspace>.<action_name>.<activation>.memory.heapUsed 16955224 1512489781
METRIC <workspace>.<action_name>.<activation>.memory.external 987361 1512489781
METRIC <workspace>.<action_name>.<activation>.error 0 1512489781
METRIC <workspace>.<action_name>.<activation>.coldstart 0 1512489781
METRIC <workspace>.<action_name>.<activation>.cpu.user 177 1512489781
METRIC <workspace>.<action_name>.<activation>.cpu.system 2 1512489781
METRIC <workspace>.<action_name>.<activation>.time.start 1511605588388 1512489781
METRIC <workspace>.<action_name>.<activation>.time.end 1511605588468 1512489781
METRIC <workspace>.<action_name>.<activation>.time.duration 80 1512489781

Once you are collecting metrics, you need a monitoring service to forward them to…

monitoring service

We’re going to look at collecting and visualising metrics using the IBM Cloud Monitoring Service.

Use the IBM® Cloud Monitoring service to expand your collection and retention capabilities when working with metrics, and to be able to define rules and alerts that notify you of conditions that require attention.

IBM Cloud Monitoring service comes with a metric collection service, Grafana-based visualisation dashboard and an alerting system.

Let’s demonstrate how to use the approaches listed above for exporting metrics to the IBM Cloud Monitoring service.

There’s an additional Node.js library to integrate the OpenWhisk Metrics library with the IBM Cloud Monitoring Service. This can forward metrics in real-time or batches (using a schedule action from a timer).

provisioning

An instance of the service must be provisioned before being used.

The service is available in multiple regions. Choose the same region as the IBM Cloud Functions instance for best performance.

Instances can be provisioned through the IBM Cloud dashboard or the IBM Cloud CLI tool.

1
 $ bx cf create-service Monitoring lite my_monitoring_svc

For more details on provisioning instances of this service, please see the documentation: https://console.bluemix.net/docs/services/cloud-monitoring/how-to/provision.html#provision

authentication

IBM Cloud Monitoring supports the following authentication methods: API Key, UAA Token or IAM Token.

An API key will be used to provide authentication credentials in the examples below.

Keys can be created through the IBM Cloud dashboard or the IBM Cloud CLI tool.

1
$ bx iam api-key-create metrics-key -d "API Key For Serverless Metrics"

Note: The API key is only shown at the time of creation. If the API key is lost, you must create a new API key.

For more details on creating API keys, please see the documentation here: https://console.bluemix.net/docs/services/cloud-monitoring/security/auth_api_key.html#auth_api_key

space domain

The GUID of the account space is also required to use the metrics service.

Retrieve this value using the IBM Cloud CLI tool. Replace SpaceName with the name of the space.

1
bx iam space SpaceName --guid

The GUID for the space is returned.

1
2
$ bx iam space dev --guid
667fadfc-jhtg-1234-9f0e-cf4123451095

Note: Space GUIDs must be prefixed with s- when being using with the monitoring service.

1
"667fadfc-jhtg-1234-9f0e-cf4123451095" => "s-667fadfc-jhtg-1234-9f0e-cf4123451095"

example (real-time forwarding)

Let’s start with an example of using real-time forwarding of metrics values. Metric values will be automatically collected by the runtime library. Before each invocation finishes, the library will send the values to the external collection service.

This example assumes you already have the CLI tool for IBM Cloud Functions installed and configured. If you need to do this, please follow the instructions here.

create new directory

1
2
$ mkdir hello-world
$ cd hello-world

initialise npm package

1
$ npm init -y

install libraries

1
$ npm install openwhisk-metrics cloud-functions-metrics-service

update action handler source

Create a file called index.js with following code.

1
2
3
4
5
6
7
8
9
10
11
12
13
14
const metrics = require('openwhisk-metrics')
const service = require('cloud-functions-metrics-service')

metrics.service = service.client({
  host: 'metrics.<???>.bluemix.net',
  scope: 's-<???>',
  api_key: '<???>'
})

const main = params => {
  return { message: "Hello World" }
}

module.exports.main = metrics(main)

Replace the host, scope and api_key parameters custom values. Host names for the regional monitoring service endpoints are listed here.

Space GUIDs must be prefixed with s- to identify a space in the scope parameter.

create new action

1
2
$ zip -r action.zip index.js package.json node_modules
$ wsk action create hello-world --kind nodejs:8 action.zip

invoke action

1
2
$ wsk action invoke hello-world -b
ok: invoked /_/hello-world with id 74add543b3b94bbbadd543b3b9dbbb17

use api to list metrics

Use curl to manually list the ingested metric labels for IBM Cloud Functions.

Replace the <???> values in the command with configuration values from above.

1
2
3
4
5
6
7
8
9
$ curl --url 'https://metrics.<???>.bluemix.net/v1/metrics/list?query=ibm.public.cloud-functions.*.*.*.*' --header 'x-auth-scope-id: s-<???>' --header 'X-Auth-User-Token: apikey <???>'
[{
  "leaf": 0,
  "context": {},
  "text": "72df4bc809c04fae9f4bc809c01fae77",
  "expandable": 1,
  "id": "ibm.public.cloud-functions.*.*.*.72df4bc809c04fae9f4bc809c01fae77",
  "allowChildren": 1
}]

Each activation identifier should be listed as a label value in the metrics service.

example (batch forwarding)

If we don’t want to add a (short) delay to each invocation, metric values can be forwarded asynchronously. An explicit action will be created to forward metric values from invocation logs. This action will be triggered on a periodic schedule using the alarm trigger feed.

This example assumes you already have the CLI tool for IBM Cloud Functions installed and configured. If you need to do this, please follow the instructions here.

create sample action

1
2
3
4
$ mkdir hello-world
$ cd hello-world
$ npm init -y
$ npm install openwhisk-metrics

Create a file called index.js with the following code.

1
2
3
4
5
6
7
const metrics = require('openwhisk-metrics')

const main = params => {
  return { message: "Hello World" }
}

module.exports.main = metrics(main)

deploy and test sample action

Package and deploy hello-world action.

1
2
$ zip -r action.zip index.js package.json node_modules
$ wsk action create hello-world --kind nodejs:8 action.zip

Metric values are written to the console for each invocation.

1
2
3
4
5
6
7
$ wsk action invoke hello-world -b
ok: invoked /_/hello-world with id 28da39d219df436a9a39d219df036a30
$ wsk activation logs 28da39d219df436a9a39d219df036a30
2017-12-18T14:38:50.751615113Z stdout: METRIC user@host_dev.hello-world.28da39d219df436a9a39d219df036a30.cpu.user 0 1513607930
2017-12-18T14:38:50.751672372Z stdout: METRIC user@host_dev.hello-world.28da39d219df436a9a39d219df036a30.cpu.system 0 1513607930
2017-12-18T14:38:50.751685034Z stdout: METRIC user@host_dev.hello-world.28da39d219df436a9a39d219df036a30.time.start 1513607930749 1513607930
...

create metric-forwarder action

Clone the project repository and install NPM dependencies.

1
2
3
$ git clone https://github.com/jthomas/cloud-functions-metrics-service
$ cd cloud-functions-metrics-service
$ npm install

Update action configuration file (config.json) with the following parameter values.

1
2
3
4
5
6
7
8
{
  "actions": ["hello-world"],
  "service": {
    "host": "metrics.<???>.bluemix.net",
    "scope": "s-<???>",
    "api_key": "<???>"
  }
}

Replace the <???> fields in the configuration file from values from above.

Package metric-forwarder action.

1
$ zip -r action.zip index.js package.json lib node_modules

deploy metric-forwarder action

Create new metric-forwarder action from deployment package and configuration file.

1
$ wsk action create metric-forwarder --kind nodejs:8 action.zip --param-file config.json

Create trigger feed for alarm package to run metric-forwarder on periodic schedule.

1
2
3
$ wsk trigger create interval \
  --feed /whisk.system/alarms/interval \
  --param minutes 1

Bind trigger to action using rule.

1
$ wsk rule create forward-metrics-on-interval interval metric-forwarder

invoke sample action

1
2
$ wsk action invoke hello-world -b
ok: invoked /_/hello-world with id 28da39d219df436a9a39d219df036a30

This will generate activation records containing metric values. When the interval trigger is next fired, metric values from these records forwarded to the collection service.

Logs from the metric-forwarder action will show the activation records that have been retrieved.

1
$ wsk activation poll metric-forwarder

use api to list metrics

Use curl to manually list the ingested metric labels for IBM Cloud Functions.

Replace the <???> values in the command with configuration values from above.

1
2
3
4
5
6
7
8
9
$ curl --url 'https://metrics.<???>.bluemix.net/v1/metrics/list?query=ibm.public.cloud-functions.*.*.*.*' --header 'x-auth-scope-id: s-<???>' --header 'x-auth-user-token: apikey <???>'
[{
  "leaf": 0,
  "context": {},
  "text": "72df4bc809c04fae9f4bc809c01fae77",
  "expandable": 1,
  "id": "ibm.public.cloud-functions.*.*.*.28da39d219df436a9a39d219df036a30",
  "allowChildren": 1
}]

Each activation identifier should be listed as a label value in the metrics service.

next steps

Metric values from our serverless applications are now being collected by the IBM Cloud Monitoring service. 👏👏👏

Applications metrics are automatically recorded by the runtime library for each invocation. Metric values are exported to the monitoring service in real-time or using a timed action to forward in batches.

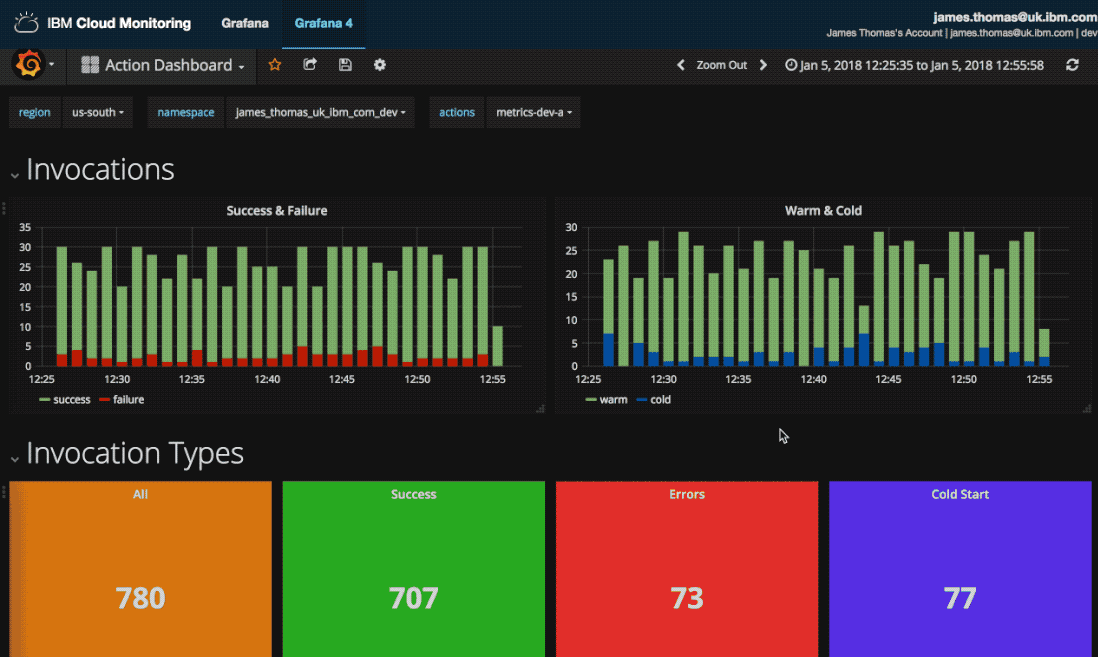
Setting up monitoring dashboards from the collected values will allow us to identify and resolve issues with our serverless applications. In the next blog post, we’ll look using Grafana to visualise metric values being collected…

Monitoring Serverless Applications Metrics

Serverless applications are not “No Ops”, despite the meme. 🙄

Monitoring runtime metrics is still crucial for serverless applications. Identifying, diagnosing and resolving issues in production requires data on execution durations, errors thrown, resource usage statistics amongst other metrics.

IBM Cloud has a comprehensive series of tools for monitoring application metrics. In this blog post series, we’re going to look at using these tools to monitor metrics from serverless applications. 💯💯💯

overview

We’ll start with understanding how to capture metrics from IBM Cloud Functions (Apache OpenWhisk) applications. Then we’ll look at methods for automatically sending metric values into the IBM Cloud Monitoring service. Once metric data is being captured, we’ll explore Grafana to create dashboards to monitor data values in real-time. Finally, we’ll look at configuring alerting services to notify us when issues occur.

Here’s a sneak peak of some of the dashboards we’ll be creating from serverless application metrics…

blog posts

Here are the links to the blog posts in the series…

You can start now with the first blog post, other blog posts will follow soon….

tldr?

pssst. want to set this up without reading all those boring words and stuff?

Here are the links to the open-source libraries used to set this up. Follow the instructions in the repositories to enable capturing and forwarding metrics to the monitoring service.

Here are the JSON configuration files for the Grafana dashboards.

https://gist.github.com/jthomas/47466693e88d0407c239535624222e6b

Import these files to create new dashboards and add the following template variables.

  • $region => ibm.public.cloud-functions.*
  • $namespace => ibm.public.cloud-functions.$region.*
  • $actions => ibm.public.cloud-functions.$region.$namespace.*

Openwhisk Logstash Forwarder

Kibana Dashboard

Debugging serverless applications in production is often reliant on application logs, due to having no access to the runtime environment. No SSHing into the machine and attaching a debugger to a process or using strace to dump system calls.

Storing, searching and analysing serverless application logs is crucial to diagnosing and fixing bugs on serverless platforms.

The ”ELK Stack” has become a popular solution for managing applications logs. Combining three open-source projects (ElasticSearch, Logstash and Kibana), this solution provides a scalable platform for importing, storing and searching application logs.

How can we use the ELK stack to manage logs for serverless applications running on Apache OpenWhisk?

ELK and OpenWhisk

In traditional application runtimes, like a VM or a Docker container, a background agent is used to automatically forward application and system logs to the ingestion service for the ELK stack.

However, serverless applications run in an ephemeral environment. Runtimes are instantiated on-demand per request and destroyed after the function returns. These runtimes do not support the use of background agents.

One solution for this is the custom OpenWhisk plugin for Logstash. This plugin polls the platform for new logs and automatically ingests them into ElasticSearch.

But what if you are using a hosted ELK service that does not support installing custom plugins?

OpenWhisk Logstash Forwarder

OpenWhisk Logstash Forwarder” is designed for this scenario. It can ingest logs into ElasticSearch using standard Logstash input plugins.

https://github.com/jthomas/openwhisk-logstash-forwarder

This project contains an OpenWhisk action which acts as a “serverless” version of the logstash-forwarder agent. When the action executes, it retrieves all new logs from a user-provided list of actions to monitor. Log messages are pushed into Logstash using the Lumberjack protocol.

The action is connected to an alarm trigger feed with a customisable schedule. This event source will ensure all logs are forwarded on a regular schedule.

Demo

Demo

In this example, the developer has the serverless logstash forwarder agent deployed in their workspace. The agent is configured to monitor logs from the forecast action. The alarm trigger feed is connected to the monitoring action and runs once per minute.

Invoking the forecast action generates log messages to be ingested.

When the alarm trigger feed next fires, the monitoring action is executed. It retrieves log messages generated by new forecast activations and pushes those logs into the configured ELK instance.

Opening Kibana and refreshing the monitoring dashboard, new log messages are shown as individual documents. Selecting the individual documents shows the log message contents with activation record details.

Source Code

The source code for this project is now available on Github:

https://github.com/jthomas/openwhisk-logstash-forwarder

See the installation instructions for how to deploy this project on an OpenWhisk platform.

This project needs an instance of OpenWhisk platform and an ELK-stack service accessible on a public IP address.

This project can be deployed using The Serverless Framework or the OpenWhisk CLI.

Advanced Openwhisk Alarm Schedules

Apache OpenWhisk supports a cron-based alarm package for invoking serverless functions on a fixed schedule, e.g. every 5 minutes, every day at 5PM, once a week.

Scheduled events allow functions to be invoked for background processes or batch operations, like processing logs generated in the past 24 hours.

Using a cron-based schedule pattern, running functions once a minute, every two hours or 5pm on Mondays is simple, but what about more complex schedule patterns? 🤔

What if we need to…

  • Fire a single one-off event at a specific time in the future?
  • Fire events a fixed period of time from an action finishing?
  • Fire events on an irregular schedule?

It is possible to implement all these examples with a few tricks… 🤹‍♂️🤹‍♂️🤹‍♂️.

Before we dive into the details, let’s review how the alarm feed provider works…

Alarm Trigger Feeds

OpenWhisk triggers are connected to external event sources using feed providers.

Feed providers listen to event sources, like message queues, firing triggers with event parameters as external events occur.

There are a number of pre-installed feed providers in the whisk.system namespace. This includes the alarms package which includes a feed provider (/whisk.system/alarms/alarm).

1
2
3
4
5
$ wsk package get /whisk.system/alarms --summary
package /whisk.system/alarms: Alarms and periodic utility
   (parameters: *apihost, *cron, *trigger_payload)
 feed   /whisk.system/alarms/alarm: Fire trigger when alarm occurs
   (parameters: none defined)

feed parameters

The following parameters are used to configure the feed provider.

  • cron - crontab syntax used to configure timer schedule.
  • trigger_payload - event parameters to fire trigger with.
  • maxTriggers - maximum number of triggers to fire (-1 for no limit).

cron is the parameter which controls when triggers will be fired. It uses the cron syntax to specify the schedule expression.

cron schedule format

Cron schedule values are a string containing sections for the following time fields. Field values can be integers or patterns including wild cards.

1
2
3
4
5
6
7
8
9
# ┌────────────── second (0 - 59, optional & defaults to 0)
# │ ┌────────────── minute (0 - 59)
# │ │ ┌────────────── hour (0 - 23)
# │ │ │ ┌────────────── day of month (1 - 31)
# │ │ │ │ ┌────────────── month (0 - 11)
# │ │ │ │ │ ┌────────────── day of week (0 - 6) (Sunday to Saturday)
# │ │ │ │ │ │
# │ │ │ │ │ │
# * * * * * *  

NOTE: Month field starts from 0 not 1, 0 is January with December being 11. Day of week also starts from 0. Sunday is first day of the week.

The second field is a non-standard cron field and does not need to be used. The Node.js module used to parse the cron schedules supports a value with five or six fields.

crontab examples

Here are some example patterns…

  • */10 * * * * * - run every 10 seconds
  • * * * * * - run every minute
  • 0 * * * * - run every hour
  • 0 */2 * * * - run every two hours
  • 30 11 * * 1-5 - run Monday to Friday at 11:30AM
  • 0 0 1 * * - run at midnight the first day of the month

https://crontab.guru/ is an online editor for generating cron schedule expressions.

Creating Alarm Triggers

Using the wsk cli triggers can be created using the alarm feed. Schedule and event parameters are passed in using command-line arguments (-p name value).

1
2
3
4
$ wsk trigger create periodic --feed /whisk.system/alarms/alarm -p cron '* * * * * *' -p trigger_payload '{"hello":"world"}'
ok: invoked /whisk.system/alarms/alarm with id 42ca80fbe7cf47318a80fbe7cff73177
...
ok: created trigger feed periodic

Trigger invocations are recorded in the activation records.

1
2
3
4
5
6
7
8
9
10
11
$ wsk activation list periodic
activations
d55d15297781474b9d15297781974b92 periodic
...
$ wsk activation get d55d15297781474b9d15297781974b92
ok: got activation d55d15297781474b9d15297781974b92
{
    "namespace": "user@host.com_dev",
    "name": "periodic",
    ...
}

Deleting the trigger will automatically remove the trigger from the alarm scheduler.

1
2
3
4
$ wsk delete periodic
ok: invoked /whisk.system/alarms/alarm with id 44e8fc5e76c64175a8fc5e76c6c175dd
...
ok: deleted trigger periodic

Programmatic Creation

The OpenWhisk JavaScript library can also register and remove triggers with feed providers.

1
2
3
4
5
6
7
8
const params = {cron: '* * * * * *', trigger_payload: {"hello":"world"}}
const name = '/whisk.system/alarms/alarm'
const trigger = 'periodic'
ow.feeds.create({name, trigger, params}).then(package => {
  console.log('alarm trigger feed created', package)
}).catch(err => {
  console.error('failed to create alarm trigger', err)
})

Triggers must already exist before registering with the feed provider using the client library.

Using the client library provides a mechanism for actions to dynamically set up scheduled events.

Advanced Examples

Having reviewed how the alarm feed works, let’s look at some more advanced use-cases for the scheduler…

Schedule one-off event at a specific time in the future

Creating one-off events, that fire at a specific date and time, is possible using the cron and maxTriggers parameters together.

Using the minute, hour, day of the month and month fields in the cron parameter, the schedule can be configured to run once a year. The day of the week field will use the wildcard value.

Setting the maxTriggers parameter to 1, the trigger is removed from the scheduler after firing.

happy new year example

What if we want to fire an event when the New Year starts?

Here’s the cron schedule for 00:00 on January 1st.

1
2
3
4
5
6
7
8
# ┌───────────── minute (0 - 59)
#  ┌───────────── hour (0 - 23)
#   ┌───────────── day of month (1 - 31)
#    ┌───────────── month (0 - 11)
#     ┌───────────── day of week (0 - 6) (Sunday to Saturday)
#     
#     
# 0 0 1 0 *

Here are the cli commands to set up a trigger to run at 01/01/2018 @ 00:00 to celebrate the new year.

1
2
3
4
$ wsk trigger create new_year --feed /whisk.system/alarms/alarm -p cron '0 0 1 0 *' -p maxTriggers 1 -p trigger_payload '{"message":"Happy New Year!"}'
ok: invoked /whisk.system/alarms/alarm with id 754bec0a58b944a68bec0a58b9f4a6c1
...
ok: created trigger new_year

Firing events a fixed period of time from an action finishing

Imagine you want to run an action on a loop, with a 60 second delay between invocations. Start times for future invocations are dependent on the finishing time of previous invocations. This means we can’t use the alarm feed with a fixed schedule like ’* * * * *’.

Instead we’ll schedule the first invocation as a one-off event and then have the action re-schedule itself using the JavaScript client library!

action code

Here’s the sample JavaScript code for an action which does that….

1
2
3
4
5
6
7
8
9
10
11
12
13
14
15
16
17
18
19
20
21
22
23
24
const openwhisk = require('openwhisk');

function calculateSchedule() {
  const now = new Date()
  const seconds = now.getSeconds()
  const nextMinute = (now.getMinutes() + 1) % 60
  return `${seconds} ${nextMinute} * * * *`
}

function main(params) {
  const ow = openwhisk();
  const params = {cron: calculateSchedule(), maxTriggers: 1}
  console.log(params)
  return ow.feeds.delete({name: '/whisk.system/alarms/alarm', trigger: 'delay'}).then(() => {
    console.log('delay trigger feed deleted.')
    return ow.feeds.create({name: '/whisk.system/alarms/alarm', trigger: 'delay', params: params})
    }).then(result => {
     console.log('delay trigger feed created.')
    })
    .catch(err => {
      console.error('failed to create/delete delay trigger', err)
      console.log("ERROR", err.error.response.result)
    })
}

setting up

  • Create an action called reschedule with code from above.
1
2
$ wsk action create reschedule reschedule.js
ok: created action reschedule
  • Create a trigger (delay) using the alarm feed, set to run in the next 60 seconds.
1
2
3
4
$ wsk trigger create delay --feed /whisk.system/alarms/alarm -p cron '* * * * * *'
ok: invoked /whisk.system/alarms/alarm with id b3da4de5726b41679a4de5726b0167c8
...
ok: created trigger delay
  • Connect the action (reschedule) to the trigger (delay) with a rule (reschedule_delay).
1
2
$ wsk rule create reschedule_delay delay reschedule
ok: created rule reschedule_delay

This action will continue to re-schedule itself indefinitely.

Stop this infinite loop by disabling or removing the rule connecting the action to the trigger.

1
2
$ wsk rule disable reschedule_delay
ok: disabled rule reschedule_delay

Firing events on an irregular schedule

How can you schedule events to occur from a predictable but irregular pattern, e.g. sending a daily message to users at sunrise?

Sunrise happens at a different time each morning. This schedule cannot be defined using a static cron-based pattern.

Using the same approach as above, where actions re-schedule triggers at runtime, events can created to follow an irregular schedule.

sunrise times

This external API provides the sunrise times for a location. Retrieving the sunrise times for tomorrow during execution will provide the date time used to re-schedule the action.

1
2
3
4
5
6
7
8
9
10
11
12
13
14
15
{
    "results": {
        "astronomical_twilight_begin": "5:13:40 AM",
        "astronomical_twilight_end": "6:48:52 PM",
        "civil_twilight_begin": "6:14:23 AM",
        "civil_twilight_end": "5:48:09 PM",
        "day_length": "10:40:26",
        "nautical_twilight_begin": "5:43:50 AM",
        "nautical_twilight_end": "6:18:42 PM",
        "solar_noon": "12:01:16 PM",
        "sunrise": "6:41:03 AM",
        "sunset": "5:21:29 PM"
    },
    "status": "OK"
}

action code

Here’s the sample JavaScript action that will re-schedule itself at sunrise.

1
2
3
4
5
6
7
8
9
10
11
12
13
14
15
16
17
18
19
20
21
22
23
24
25
26
27
28
29
30
31
32
33
34
35
36
37
38
39
40
41
42
43
const openwhisk = require('openwhisk');
const request = require('request-promise');

function getNextSunrise(lat, lng, when) {
  const options = {
    uri: 'https://api.sunrise-sunset.org/json',
    qs: { lat: lat, lng: lng, when: when },
    json: true
  }

  return request(options)
    .then(result => result.results.sunrise)
}

function calculateSchedule(sunrise) {
  console.log('Next sunrise:', sunrise)
  const sections = sunrise.split(':')
  const hour = sections[0], minute = sections[1]
  return `${minute} ${hour} * * *`
}

function scheduleSunriseEvent (sunrise) {
  const ow = openwhisk();
  const params = {cron: sunrise, maxTriggers: 1}
  return ow.feeds.delete({name: '/whisk.system/alarms/alarm', trigger: 'sunrise'}).then(() => {
    console.log('trigger feed deleted.')
    return ow.feeds.create({name: '/whisk.system/alarms/alarm', trigger: 'sunrise', params: params})
  }).then(result => {
    console.log('trigger feed created.')
  })
  .catch(err => {
    console.error('failed to create/delete trigger', err)
    console.log("ERROR", err.error.response.result)
  })
}

function main(params) {
  console.log('GOOD MORNING!')

  return getNextSunrise(params.lat, params.lng, 'tomorrow')
    .then(calculateSchedule)
    .then(scheduleSunriseEvent)
}

setting up

  • Create an action called wake_up with code from above. lat and lng parameters define location for sunrise.
1
2
$ wsk action create wake_up wake_up.js -p lat 51.50 -p lng -0.076
ok: created action wake_up
  • Create a trigger (sunrise) with the alarm feed, scheduled for the next sunrise.
1
2
3
4
$ wsk trigger create sunrise --feed /whisk.system/alarms/alarm -p cron '03 41 06 * * *'
ok: invoked /whisk.system/alarms/alarm with id 606dafe276f24400adafe276f2240082
...
ok: created trigger sunrise
  • Connect the action (wake_up) to the trigger (sunrise) with a rule (wake_up_at_sunrise).
1
2
$ wsk rule create wake_up_at_sunrise sunrise wake_up
ok: created rule wake_up_at_sunrise

Checking the activation logs the following morning will show the trigger being fired, which invokes the action, which re-schedules the one-off event! 🌅🌅🌅

Caveats

Here’s a few issues you might encounter using the alarm feed that I ran into….

  • Month field in cron schedule starts from zero not one. January is 0, December is 11.
  • Day of the week field starts from zero. First day of the week is Sunday, not Monday.
  • Feeds cannot be updated with a new schedule once created. Feeds must be deleted before being re-created to use a different schedule.

Future Plans

Extending the alarm feed to support even more features and improve the developer experience is in-progress. There are a number of Github issues in the official OpenWhisk repository around this work.

If you have feature requests, discover bugs with the feed or have other suggestions, please comment on the existing issues or open new ones.

Conclusion

Scheduled events are a necessary feature of serverless cloud platforms. Due to the ephemeral nature of runtime environments, scheduling background tasks must be managed by the platform.

In Apache OpenWhisk, the alarm feed allows static events to be generated on a customisable schedule. Using a cron-based schedule pattern, running functions once a minute, every two hours or 5pm on Mondays, is simple but what about more complex schedule patterns?

Using the cron and maxTriggers parameters with the OpenWhisk client library, much more advanced event schedules can be utilised within the platform. In the examples above, we looked at how to schedule one-off events, events using a predictable but irregular schedule and how actions can re-schedule events at runtime. 💯💯💯

Large Applications on OpenWhisk

OpenWhisk supports creating actions from archive files containing source files and project dependencies.

The maximum code size for the action is 48MB.

Applications with lots of third-party modules, native libraries or external tools may be soon find themselves running into this limit. Node.js libraries are notorious for having large amounts of dependencies.

What if you need to deploy an application larger than this limit to OpenWhisk?

Previous solutions used Docker support in OpenWhisk to build a custom Docker image per action. Source files and dependencies are built into a public image hosted on Docker Hub.

This approach overcomes the limit on deployment size but means application source files will be accessible on Docker Hub. This is not an issue for building samples or open-source projects but not realistic for most applications.

So, using an application larger than this limit requires me to make my source files public? 🤔

There’s now a better solution! 👏👏👏

OpenWhisk supports creating actions from an archive file AND a custom Docker image.

If we build a custom Docker runtime which includes shared libraries, those dependencies don’t need including in the archive file. Private source files will still be bundled in the archive and injected at runtime.

Reducing archive file sizes also improves deployment times.

Let’s look at an example…

Using Machine Learning Libraries on OpenWhisk

Python is a popular language for machine learning and data science. Libraries like pandas, scikit-learn and numpy provide all the tools. Serverless computing is becoming a good choice for machine learning microservices.

OpenWhisk supports Python 2 and 3 runtimes.

Popular libraries like flask, requests and beautifulsoup are available as global packages. Additional packages can be imported using virutalenv during invocations.

Python Machine Learning Libraries

Python packages can be used in OpenWhisk using virtualenv. Developers install the packages locally and include the virutalenv folder in the archive for deployment.

Machine Learning libraries often use numerous shared libraries and compile native dependencies for performance. This can lead to hundreds of megabytes of dependencies.

Setting up a new virtualenv folder and installing pandas leads to an environment with nearly 100MB of dependencies.

1
2
3
4
5
6
7
8
9
$ virtualenv env
$ source env/bin/activate
$ pip install pandas
...
Installing collected packages: numpy, six, python-dateutil, pytz, pandas
Successfully installed numpy-1.13.1 pandas-0.20.3 python-dateutil-2.6.1 pytz-2017.2 six-1.10.0
$ du -h
...
84M   . <-- FOLDER SIZE 😱

Bundling these libraries within an archive file will not be possible due to the file size limit.

Custom OpenWhisk Runtime Images

Overcoming this limit can be achieved using a custom runtime image. The runtime will pre-install additional libraries during the build process and make them available during invocations.

OpenWhisk uses Docker for the runtime containers. Source files for the images are available on Github under the core folder. Here’s the Dockerfile for the Python runtime: https://github.com/apache/incubator-openwhisk/blob/master/core/pythonAction/Dockerfile.

Images for OpenWhisk runtimes are also available on Docker Hub under the OpenWhisk organisation.

Docker supports building new images from a parent image using the FROM directive. Inheriting from the existing runtime images means the Dockerfile for the new runtime only has to contain commands for installing extra dependencies.

Let’s build a new Python runtime which includes those libraries as shared packages.

Building Runtimes

Let’s create a new Dockerfile which installs additional packages into the OpenWhisk Python runtime.

1
2
3
4
5
6
7
8
9
10
11
12
13
14
15
16
17
FROM openwhisk/python3action

# lapack-dev is available in community repo.
RUN echo "http://dl-4.alpinelinux.org/alpine/edge/community" >> /etc/apk/repositories

# add package build dependencies
RUN apk add --no-cache \
        g++ \
        lapack-dev \
        gfortran

# add python packages
RUN pip install \
    numpy \
    pandas \
    scipy \
    sklearn

Running the Docker build command will create a new image with these extra dependencies.

1
2
3
4
5
6
7
$ docker build -t python_ml_runtime .
Sending build context to Docker daemon  83.01MB
Step 1/4 : FROM openwhisk/python3action
 ---> 46388e726fae
...
Successfully built cfc14a93863e
Successfully tagged python_ml_runtime:latest

Hosting images on Docker Hub requires registering a (free) account @ https://hub.docker.com/

Create a new tag from the python_ml_runtime image containing the Docker Hub username.

1
$ docker tag python_ml_runtime <YOUR_USERNAME>/python_ml_test

Push the image to Docker Hub to make it available to OpenWhisk.

1
$ docker push <YOUR_USERNAME>/python_ml_test

Testing It Out

Create a new Python file (main.py) with the following contents:

1
2
3
4
5
6
7
8
9
10
11
12
import numpy
import pandas
import sklearn
import scipy

def main(params):
    return {
        "numpy": numpy.__version__,
        "pandas": pandas.__version__,
        "sklearn": sklearn.__version__,
        "scipy": scipy.__version__
    }

Create a new OpenWhisk action using the Docker image from above and source file.

1
2
$ wsk action create lib-versions --docker <YOUR_USERNAME>/openwhisk_python_ml main.py
ok: created action lib-versions

Invoke the action to verify the modules are available and return the versions.

1
2
3
4
5
6
7
$ wsk action invoke lib-versions --result
{
    "numpy": "1.13.1",
    "pandas": "0.20.3",
    "scipy": "0.19.1",
    "sklearn": "0.18.2"
}

Yass. It works. 💃🕺

Serverless Machine Learning here we come…. 😉

Conclusions

Using custom runtimes with private source files is an amazing feature of OpenWhisk. It enables developers to run larger applications on the platform but also enables lots of other use cases. Almost any runtime, library or tool can now be used from the platform.

Here are some examples of where this approach could be used…

  • Installing global libraries to reduce archive file size under 48MB and speed up deployments.
  • Upgrading language runtimes, i.e. using Node.js 8 instead of 6.
  • Adding native dependencies or command-line tools to the environment, e.g. ffmpeg.

Building new runtimes is really simple using pre-existing base images published on Dockerhub.

The possibilities are endless!

Creating Swift Binaries for OpenWhisk

In the previous blog post, we explained how to write Serverless Swift functions using OpenWhisk actions.

Swift sources files are compiled into a binary by the platform before processing requests.

This compilation process adds a delay on the invocation time for “cold” runtimes. If the action has not been invoked for a while, the system is under heavy load or multiple invocations are received in parallel, a new runtime will need to be initialised.

Pre-compiled binaries can be deployed to remove this delay. Binaries must be compiled for the correct platform architecture and support execution through the OpenWhisk runtime.

There is now a Swift package to make the process of building pre-compiled binaries much easier.

Let’s have a look at how this works…

Swift Packages

Swift introduced a package manager in Swift 3.0. The package manager integrates with the build system to “automate the process of downloading, compiling, and linking dependencies”.

Swift uses a manifest file (Packages.swift) to define package properties including dependencies.

Example Swift Package

Here’s an example manifest file from a sample package with external dependencies.

1
2
3
4
5
6
7
8
9
10
11
12
import PackageDescription

let package = Package(
    name: "DeckOfPlayingCards",
    targets: [],
    dependencies: [
        .Package(url: "https://github.com/apple/example-package-fisheryates.git",
                 majorVersion: 1),
        .Package(url: "https://github.com/apple/example-package-playingcard.git",
                 majorVersion: 1),
    ]
)

Packages are referenced through a URL which resolves to a Git repository. Semantic versioning conventions are used to control the package version installed.

External packages are downloaded, compiled and linked in the project during the build process.

1
2
3
4
5
6
7
8
9
10
11
12
13
14
15
16
$ swift build
Fetching https://github.com/apple/example-package-deckofplayingcards.git
Fetching https://github.com/apple/example-package-fisheryates.git
Fetching https://github.com/apple/example-package-playingcard.git
Cloning https://github.com/apple/example-package-fisheryates.git
Resolving https://github.com/apple/example-package-fisheryates.git at 2.0.3
Cloning https://github.com/apple/example-package-playingcard.git
Resolving https://github.com/apple/example-package-playingcard.git at 3.0.2
Cloning https://github.com/apple/example-package-deckofplayingcards.git
Resolving https://github.com/apple/example-package-deckofplayingcards.git at 3.0.3
Compile Swift Module 'PlayingCard' (3 sources)
Compile Swift Module 'FisherYates' (2 sources)
Compile Swift Module 'DeckOfPlayingCards' (1 sources)
Compile Swift Module 'Dealer' (1 sources)
Linking ./.build/debug/Dealer
$

OpenWhiskAction Package

OpenWhiskAction is a Swift package for registering Swift functions as OpenWhisk actions.

It bundles the Swift source files used to implement the runtime handler for OpenWhisk as a library. Using this package means developers do not have to manually import those source files into their projects.

usage

This package exposes a public function (OpenWhiskAction ) that should be called with a function reference (([String: Any]) -> [String: Any])) as a named parameter (main). The callback will be executed with the invocation parameters. Returned values will be serialised as the invocation response.

1
2
3
4
5
6
7
8
9
10
11
import OpenWhiskAction

func hello(args: [String:Any]) -> [String:Any] {
    if let name = args["name"] as? String {
      return [ "greeting" : "Hello \(name)!" ]
    } else {
      return [ "greeting" : "Hello stranger!" ]
    }
}

OpenWhiskAction(main: hello)

example

Let’s show an example of using the package to build a pre-compiled Swift action for OpenWhisk.

create new package

Create a new directory and use the swift package init command to generate the boilerplate package.

1
2
3
4
5
6
7
8
9
10
11
12
$ mkdir Action
$ cd Action/
$ swift package init
Creating library package: Action
Creating Package.swift
Creating .gitignore
Creating Sources/
Creating Sources/Action.swift
Creating Tests/
Creating Tests/LinuxMain.swift
Creating Tests/ActionTests/
Creating Tests/ActionTests/ActionTests.swift

add package dependency

Add the OpenWhiskAction package as a dependency to the manifest file (Package.swift).

1
2
3
4
5
6
7
8
import PackageDescription

let package = Package(
    name: "Action",
    dependencies: [
        .Package(url: "https://github.com/jthomas/OpenWhiskAction.git", majorVersion: 0)
    ]
)

write serverless function

Create a new main.swift file under the Sources directory containing the following source code.

1
2
3
4
5
6
7
8
9
10
11
import OpenWhiskAction

func hello(args: [String:Any]) -> [String:Any] {
    if let name = args["name"] as? String {
      return [ "greeting" : "Hello \(name)!" ]
    } else {
      return [ "greeting" : "Hello stranger!" ]
    }
}

OpenWhiskAction(main: hello)

Swift’s build process will produce an executable if the package contains a main.swift file. That file will be compiled as the package binary.

compiling with docker

OpenWhisk Swift actions use a custom Docker image as the runtime environment. Compiling application binaries from this image will ensure it is compatible with the platform runtime.

This command will run the swift build command within a container from this image. The host filesystem is mounted into the container at /swift-package. Binaries and other build artifacts will be available in ./.build/release/ after the command has executed.

1
docker run --rm -it -v $(pwd):/swift-package openwhisk/action-swift-v3.1.1 bash -e -c "cd /swift-package && swift build -v -c release"

deploying to openwhisk

OpenWhisk actions can be created from a zip file containing action artifacts. The zip file will be expanded prior to execution. In the Swift environment, the Swift binary executed by the platform should be at ./.build/release/Action.

If an action is deployed from a zip file which contains this file, the runtime will execute this binary rather than compiling a new binary from source code within the zip file.

1
2
3
4
5
6
7
8
$ zip action.zip .build/release/Action
  adding: .build/release/Action (deflated 67%)
$ wsk action create swift-action --kind swift action.zip
ok: created action swift-action
$ wsk action invoke --blocking --result -p name "Bernie Sanders" swift-action
{
    "greeting": "Hello Bernie Sanders!"
}

Using With The Serverless Framework

As shown in the previous blog post, The Serverless Framework supports the Swift runtime. Actions can either be created from Swift source files or pre-compiled binaries.

This example project demonstrates how to integrate pre-compiled binaries into a serverless framework application.

example project

The project contains two Swift source files under the Sources directory. Using the main.swift file name means these files will be compiled into separate binaries under the .build/release directory.

1
2
3
4
5
6
7
8
9
10
11
12
13
$ tree .
.
├── Package.swift
├── README.md
├── Sources
│   ├── hello
│   │   └── main.swift
│   └── welcome
│       └── main.swift
├── package.json
└── serverless.yml

3 directories, 6 files

The package manifest (Package.swift) contains the OpenWhiskAction dependency.

serverless.yml

1
2
3
4
5
6
7
8
9
10
11
12
13
14
15
16
17
18
19
service: swift-packages

provider:
  name: openwhisk
  runtime: swift

functions:
  hello:
    handler: .build/release/hello
  welcome:
    handler: .build/release/welcome

custom:
  scripts:
    hooks:
      'package:initialize': npm run-script compile
plugins:
  - serverless-openwhisk
  - serverless-plugin-scripts

This configuration file describes two actions (hello and welcome) using the swift runtime. The handler property for those actions refers to a binary, produced by the build process, rather than source file.

compile during deployment

Before using serverless deploy command to create our application, we need to compile binaries for the OpenWhisk runtime.

Manually running the Swift build command before each deployment is cumbersome and error-prone.

Let’s automate this process…

Using NPM’s scripts feature, the project exports a new command npm run-script compile which triggers the build process using the OpenWhisk Docker runtime for Swift.

1
2
3
4
5
6
7
8
9
10
11
12
13
14
15
16
17
{
  "name": "openwhisk-swift-package-with-precompiled-binaries",
  "version": "1.0.0",
  "description": "Swift packages and pre-compiled binaries on OpenWhisk.",
  "main": "handler.js",
  "scripts": {
    "postinstall": "npm link serverless-openwhisk",
    "compile": "docker run --rm -it -v $(pwd):/swift-package openwhisk/action-swift-v3.1.1 bash -e -c 'cd /swift-package && swift build -v -c release'"
  },
  "keywords": [
    "serverless",
    "openwhisk"
  ],
  "dependencies": {
    "serverless-plugin-scripts": "^1.0.2"
  }
}

The serverless-plugin-scripts plugin provides a mechanism for running shell commands when framework commands are executed. Using this plugin we can use the package:initialize event to execute the npm run-script compile command.

1
2
3
4
custom:
  scripts:
    hooks:
      'package:initialize': npm run-script compile

The package:initialize event is fired when the serverless deploy command executes.

Swift binaries will be compiled prior to deployment without any manual steps from the developer.

1
2
3
4
5
6
7
8
9
10
11
12
13
14
15
16
17
18
19
20
21
22
23
24
25
26
27
28
$ serverless deploy
> openwhisk-swift-package-with-precompiled-binaries@1.0.0 compile /Users/james/code/bluemix/serverless-examples/openwhisk-swift-precompiled-binaries
> docker run --rm -it -v $(pwd):/swift-package openwhisk/action-swift-v3.1.1 bash -e -c 'cd /swift-package && swift build -v -c release'
...
Serverless: Packaging service...
Serverless: Compiling Functions...
Serverless: Compiling API Gateway definitions...
Serverless: Compiling Rules...
Serverless: Compiling Triggers & Feeds...
Serverless: Deploying Functions...
Serverless: Deployment successful!

Service Information
platform:   openwhisk.ng.bluemix.net
namespace:  _
service:    swift-packages

actions:
swift-packages-dev-hello    swift-packages-dev-welcome
...
$ serverless invoke -f hello
{
    "greeting": "Hello stranger!"
}
$ serverless invoke -f welcome
{
    "greeting": "Welcome stranger!"
}

Conclusion

OpenWhisk supports creating Swift actions from source files and pre-compiled binaries. Using binaries reduces the startup time for “cold” environments. This is important for latency sensitive applications like API endpoints.

Swift binaries for OpenWhisk must be compiled for the correct architecture and support execution through the platform runtime. Previous instruction for producing these binaries involved numerous manual and error-prone steps.

This process has now been improved through a new Swift package which wraps the runtime handler source files. Adding this dependency into the package manifest file means the downloading, compiling and linking of these source files will be handled by the Swift package manager.

Recent updates to the OpenWhisk provider plugin for The Serverless Framework also added support for pre-compiled Swift binaries. Combined with other plugins, the framework can now completely automate the process of building binaries for the Swift runtime.

Building binaries for Swift OpenWhisk actions has never been easier! 😎

Serverless Swift With OpenWhisk

Swift is one of the fastest growing programming languages with developers.

Swift has reached a Top 15 ranking faster than any other language we have tracked.

Created for building mobile applications, the language is now popular with backend development.

But for Swift developers beginning to build backend applications, they now find themselves having to manage computing infrastructure to run their applications in the cloud.

Enter serverless cloud platforms… ☁️☁️☁️

These services allow developers to push code, rather than VMs, into the cloud. The platforms allow you to connect external event sources like API requests or message queues to functions in your code. As events occur, your code is instantiated and executed to process each request. Developers are only billed for the milliseconds needed to process each request.

Serverless platforms let you run applications in the cloud without worrying about infrastructure. 😎

Apache OpenWhisk is currently the only serverless platform to support Swift language functions.

Let’s have a look at how you can use Swift with OpenWhisk before diving into how the platform implements this feature to give us some tips and tricks for Swift on OpenWhisk…

Swift On OpenWhisk

Using the CLI

Create a Swift file with the following source code in.

1
2
3
4
5
6
7
func main(args: [String:Any]) -> [String:Any] {
    if let name = args["name"] as? String {
        return [ "greeting" : "Hello \(name)!" ]
    } else {
        return [ "greeting" : "Hello stranger!" ]
    }
}

Swift actions must consume and return a dictionary. The dictionary passed as the function argument will contain event parameters. Returned dictionary values must support serialisation to JSON.

Create and invoke a new OpenWhisk action using the command-line utility.

1
2
3
4
5
6
7
8
9
10
$ wsk action create swift action.swift
ok: created action swift
$ wsk action invoke swift --result
{
    "greeting": "Hello stranger!"
}
$ wsk action invoke swift --result --param name World
{
    "greeting": "Hello World!"
}

The result flag will only show the action output in the console rather than the full API response.

The source file must have a function called main. Each invocation executes this function. The function name to invoke can be overridden as shown below.

1
2
3
func foo(args: [String:Any]) -> [String:Any] {
    return [ "greeting" : "Hello foo!" ]
}
1
2
3
4
5
6
$ wsk action create foobar action.swift --main foo
ok: created action foobar
$ wsk action invoke foobar --result
{
    "greeting": "Hello foo!"
}

Choosing the runtime for the action can be set using the kind flag. If the source file has the .swift extension this will be automatically set to swift:default.

OpenWhisk uses Swift 3.0.2 that runs on the Linux environment. There are open issues to support Swift 3.1 and Swift 4.

Using the Serverless Framework

The Serverless Framework is a popular open-source framework for building serverless applications. It provides CLI tools and a workflow for managing serverless development.

Developers use a YAML file to define their application functions, events and resources. The framework handles deploying the application to their serverless provider.

Having started as a tool for AWS Lambda, the framework recently added multi-provider support. It now also works with Apache OpenWhisk, Azure Functions and Google Cloud Functions.

Let’s look at an example of using this framework to create a new OpenWhisk Swift application. Using a provider name and runtime, the framework can scaffold a new serverless application.

1
2
3
4
5
6
7
8
9
10
11
12
13
14
15
16
17
18
19
20
$ serverless create -t openwhisk-swift -p swift-action
Serverless: Generating boilerplate...
Serverless: Generating boilerplate in "/home/me/swift-action"
 _______                             __
|   _   .-----.----.--.--.-----.----|  .-----.-----.-----.
|   |___|  -__|   _|  |  |  -__|   _|  |  -__|__ --|__ --|
|____   |_____|__|  \___/|_____|__| |__|_____|_____|_____|
|   |   |             The Serverless Application Framework
|       |                           serverless.com, v1.16.0
 -------'

Serverless: Successfully generated boilerplate for template: "openwhisk-swift"
$ tree swift-action/
swift-action/
├── README.md
├── package.json
├── ping.swift
└── serverless.yml

0 directories, 4 files

The openwhisk-swift directory contains the boilerplate application ready to deploy. It includes a sample action (ping.swift) and the configuration file (serverless.yml).

1
2
3
4
5
6
7
8
9
10
11
func main(args: [String:Any]) -> [String:Any] {
    let formatter = DateFormatter()
    formatter.dateFormat = "yyyy-MM-dd HH:mm:ss"
    let now = formatter.string(from: Date())

    if let name = args["name"] as? String {
      return [ "greeting" : "Hello \(name)! The time is \(now)" ]
    } else {
      return [ "greeting" : "Hello stranger! The time is \(now)" ]
    }
}
1
2
3
4
5
6
7
8
9
10
11
12
service: swift-action

provider:
  name: openwhisk
  runtime: swift

functions:
  hello:
    handler: ping.main

plugins:
  - serverless-openwhisk

Install the provider plugin using npm install and type serverless deploy to deploy this application.

1
2
3
4
5
6
7
8
9
10
11
12
13
14
15
16
17
18
19
20
21
$ serverless deploy
Serverless: Packaging service...
Serverless: Compiling Functions...
Serverless: Compiling API Gateway definitions...
Serverless: Compiling Rules...
Serverless: Compiling Triggers & Feeds...
Serverless: Deploying Functions...
Serverless: Deployment successful!

Service Information
platform: openwhisk.ng.bluemix.net
namespace:    _
service:  swift-action

actions:
swift-action-dev-hello
...
$ serverless invoke -f hello
{
    "greeting": "Hello stranger! The time is 2017-06-23 10:52:02"
}

For more information on using the Serverless Framework with OpenWhisk, please see this documentation: https://serverless.com/framework/docs/providers/openwhisk/.

How It Works

Swift is a statically typed compiled language. Unlike JavaScript or Python, Swift source code must be compiled into a binary for execution.

Swift actions in OpenWhisk can be created from Swift source files, rather than binaries, meaning the platform must run this compilation step.

Swift on Docker

OpenWhisk uses Docker containers to manage the action runtime environments. This Dockerfile documents the build steps for generating the Swift runtime image used in OpenWhisk.

Images for each of the OpenWhisk runtime environments are available on Docker Hub. Creating containers from these images allows you to explore the Swift runtime environment.

1
2
$ docker pull openwhisk/swift3action
$ docker run -it --rm openwhisk/swift3action bash

For more information on the API exposed by runtime containers to initialise and invoke actions, please see this blog post.

Building Swift actions

Swift runtime environments has a template package available in the /swift3Action/spm-build directory.

All the Swift sources files provided by the user are written into that package’s main.swift file. The following source code is appended to main.swift to support execution within the OpenWhisk runtime. It parses the input parameters from the environment, invokes the registered function name and returns the computation response as a JSON string.

Dependencies for the following packages are included in the existing Package.swift file. These packages can be used from the action source code without further configuration.

1
2
3
4
5
6
7
8
9
10
import PackageDescription

let package = Package(
    name: "Action",
        dependencies: [
          .Package(url: "https://github.com/IBM-Swift/Kitura-net.git", "1.0.1"),
            .Package(url: "https://github.com/IBM-Swift/SwiftyJSON.git", "14.2.0"),
            .Package(url: "https://github.com/IBM-Swift/swift-watson-sdk.git", "0.4.1")
        ]
)

During initialisation, the Swift build process is executed to generate the action binary.

This artifact (/swift3Action/spm-build/.build/release/Action) will be executed for each invocation received by the platform.

Container re-use

Containers used for action runtimes are re-used with subsequent requests. This means any initialisation cost, e.g. compiling Swift source code, will only be incurred once per runtime container.

Runtime containers are evicted from the cache ten minutes after the last activation. Future invocations for that runtime will use a new container and have to run the initialisation step again.

Additionally, runtimes containers cannot process concurrent requests. If a request arrives before the previous one has finished processing, a new environment will need to be initialised.

Improving cold start time

Swift build times are not known for being fast.

Build time is included in the request processing time for each new runtime container provisioned.

In an attempt to reduce this delay, OpenWhisk runs the minimum build steps necessary to compile the source code, rather than a full release build.

During the Docker build for the Swift runtime image, the full release build is executed for the empty action package. This generates object files and other intermediary build outputs which are stored in the build cache.

Logs from the build process are parsed to retrieve the individual compilation and linking commands for the main.swift file. These commands are written into a new shell script (/swift3Action/spm-build/swiftbuildandlink.sh).

When a new Swift runtime container is initialised, the source code for the action is written into the main.swift file. Rather than running a full re-build, the runtime just executes the shell script containing the compilation and linking steps. This re-uses the cached build objects and reduces compilation time.

Modifying package dependencies

Swift packages uses a manifest file (Packages.swift) to list package dependencies. Dependencies are automatically downloaded and compiling during the package build process.

The Swift environment used by OpenWhisk uses the package manifest shown above. This includes dependencies for JSON and HTTP libraries.

Swift actions can be created from Swift source code or zip files. Zip files are expanded into the package directory (/swift3action/spm-build) before initialisation.

If the zip file contains a new package manifest, this will overwrite the default manifest in the environment.

1
2
3
4
5
6
7
8
9
10
11
import PackageDescription

let package = Package(
    name: "Action",
        dependencies: [
          .Package(url: "https://github.com/IBM-Swift/Kitura-net.git", "1.0.1"),
            .Package(url: "https://github.com/IBM-Swift/SwiftyJSON.git", "14.2.0"),
            .Package(url: "https://github.com/IBM-Swift/swift-watson-sdk.git", "0.4.1"),
          .Package(url: "https://github.com/IBM-Swift/swift-html-entities", majorVersion: 3, minor: 0),
        ]
)

Running a full build will download new package dependencies and make them available for use in our action.

OpenWhisk uses a shell script (swiftbuildandlink.sh) to manage the build process during initialisation. This defaults to only running the compiler and linker commands for the main.swift file, rather than a full release build.

Including a replacement swiftbuildandlink.sh file in the zip file will allow us to modify the build command used, e.g. swift build -v -c release.

1
2
3
4
#!/bin/bash
echo "Release build running..."
swift build -v -c release
echo "Release build finished."

Downloading additional packages will add a significant delay to initialising new runtime containers.

If this is an issue, let’s look at skipping the compile step entirely…

Compiling binaries locally

Swift actions execute a binary that is available at the following path: /swift3action/spm-build/.build/release/Action.

The runtime uses the existence of this binary to control running the build process. If the file does not exist, the build step is executed. It ensures that compilation is only ran once per runtime container.

This also means that developers can include a locally compiled Swift binary inside the action zip file. During initialisation, the existence of this file will stop the build process from running.

If you want to use lots of additional Swift packages, the compile time penalty won’t have to be incurred during action invocations. This will dramatically speed up invocation times for “cold” actions.

Binaries must be compatible with the platform environment they are being executed within. OpenWhisk uses Swift 3.0.2 on Linux.

OpenWhisk publishes the runtime environments as Docker images. Using containers from these images to compile our action binaries will ensure the binary is compatible.

These instructions show you how to compile your source code into a compatible platform binary.

1
2
3
4
5
6
7
8
9
10
11
12
13
# run an interactive Swift action container
docker run -it -v `pwd`:/ow openwhisk/swift3action bash
cd /ow
# now inside the docker shell
# copy the source code and prepare to build it
cat /swift3Action/epilogue.swift >> main.swift
echo '_run_main(mainFunction:main)' >> main.swift
# build and link (the expensive step)
swift build -v -c release
# create the zip archive
zip action.zip .build/release/Action
# exit the docker shell
exit

The action.zip file can then be deployed as a new action using the following command-line.

1
wsk action create static-swift action.zip --kind swift:3

Conclusion

Swift is one of the fastest growing programming languages with developers. People are increasingly using it to develop backend APIs and services. Being able to use Swift on serverless cloud platforms means developers can focus on writing code, rather than managing infrastructure.

Apache OpenWhisk, an open-source serverless platform, supports Swift as a first-class language. Developers can provide Swift source code and have the platform execute these functions in response to external events.

Because OpenWhisk is open-source, we can discover how the platform executes the code using the Swift runtime. Understanding this process allows us to modify the build step to use additional Swift packages within our actions. We can also improve performance by skipping the compilation stage entirely by providing a native binary.

Python Packages in OpenWhisk

OpenWhisk’s Python runtime includes popular third-party libraries like requests, scrapy and simplejson. Developers don’t have to manually install packages to use those libraries.

Great, but what about using other libraries that aren’t pre-installed?

In a previous blog post, we showed how to deploy Node.js actions from zip files containing third-party modules. These modules are then made available in the Node.js runtime.

Recent updates to OpenWhisk allow us to use the same approach with the Python runtime!

Python Packages

Python packages can be installed using the pip tool. This can be used to install individual packages or a series of dependencies from an external file.

1
2
$ pip install blah
$ pip install -r requirements.txt

pip defaults to installing packages in a global location (site-packages) which is shared between all users. This can cause issues when different projects require different versions of the same package.

virtualenv

virtualenv is a tool that solves this issue by creating virtual python environments for projects. The virtual environment includes a custom site-packages folder to install packages into.

1
2
3
4
5
$ virtualenv env
Using base prefix '/Library/Frameworks/Python.framework/Versions/3.6'
New python executable in /private/tmp/env/bin/python3.6
Also creating executable in /private/tmp/env/bin/python
Installing setuptools, pip, wheel...done.

OpenWhisk recently added support for using virtualenv in the Python runtime.

custom packages on openwhisk

OpenWhisk actions can be created from a zip file containing source files and other resources.

If the archive includes a virtual Python environment folder, the platform runs the ./bin/activate_this.py script before executing Python actions. This script modifies the module search path to include the local site-packages folder.

This will only happen during “cold” activations.

This feature comes with the following restrictions.

  • Virtual Python environment must be in a folder called virtualenv under the top-level directory.
  • Packages must be available for the Python runtime being used in OpenWhisk (2.7 or 3.6).

Let’s look at an example of building an OpenWhisk Python action which uses an external Python package.

Python Package Example

The pyjokes package provides a library for generating (terrible) jokes for programmers. Let’s turn this package into an API (Jokes-as-a-Service!) using the Python runtime on OpenWhisk.

Start by creating a new directory for your project and set up the virtual Python environment.

1
2
3
4
5
6
7
8
9
10
11
12
13
$ mkdir jokes; cd jokes
$ virtualenv virtualenv
Using base prefix '/Library/Frameworks/Python.framework/Versions/3.6'
New python executable in /tmp/jokes/virtualenv/bin/python3.6
Also creating executable in /tmp/jokes/virtualenv/bin/python
Installing setuptools, pip, wheel...done.
$ source virtualenv/bin/activate
(virtualenv) $ pip install pyjokes
Collecting pyjokes
  Using cached pyjokes-0.5.0-py2.py3-none-any.whl
Installing collected packages: pyjokes
Successfully installed pyjokes-0.5.0
(virtualenv) $

In the project directory, create a new file (__main__.py) and paste the following code.

1
2
3
4
import pyjokes

def joke(params):
    return {"joke": pyjokes.get_joke()}

Check the script works with the Python intepreter.

1
2
3
4
(virtualenv) $ python -i .
>>> joke({})
{'joke': 'What do you call a programmer from Finland? Nerdic.'}
>>>

Add the virtualenv folder and Python script to a new zip file.

1
2
3
4
5
6
7
8
$ zip -r jokes.zip virtualenv __main__.py
  adding: virtualenv/ (stored 0%)
  adding: virtualenv/.Python (deflated 65%)
  adding: virtualenv/bin/ (stored 0%)
  adding: virtualenv/bin/activate (deflated 63%)
  ...
$ ls
__main__.py  jokes.zip   virtualenv

Create a new OpenWhisk action for the Python runtime using the wsk cli.

1
2
$ wsk action create jokes --kind python:3 --main joke jokes.zip
ok: created action jokes

Invoking our new action will return (bad) jokes on-demand using the third-party Python package.

1
2
3
4
$ wsk action invoke jokes --blocking --result
{
    "joke": "Software salesmen and used-car salesmen differ in that the latter know when they are lying."
}

Installing Packages With Docker

In the example above, the Python runtime used in development (v3.6) matched the OpenWhisk runtime environment. Packages installed using virtualenv must be for the same major and minor versions of the Python runtime used by OpenWhisk.

OpenWhisk publishes the runtime environments as Docker images on Docker Hub.

Running containers from those runtime images provides a way to download packages for the correct environment.

1
2
3
4
5
6
7
8
9
10
11
$ docker run --rm -v "$PWD:/tmp" openwhisk/python3action sh \
  -c "cd tmp; virtualenv virtualenv; source virtualenv/bin/activate; pip install pyjokes;"
Using base prefix '/usr/local'
New python executable in /tmp/virtualenv/bin/python3.6
Also creating executable in /tmp/virtualenv/bin/python
Installing setuptools, pip, wheel...done.
Collecting pyjokes
  Downloading pyjokes-0.5.0-py2.py3-none-any.whl
Installing collected packages: pyjokes
Successfully installed pyjokes-0.5.0
$

This will leave you a virtualenv folder in the current directory with packages for the correct Python runtime.

Speeding Up Deployments

Peeking inside the virtualenv folder reveals a huge number of files to set up the virtual Python environment. If we just want to use a third-party package from the local site-packages folder, most of those files are unnecessary.

Adding this entire folder to the zip archive will unnecessarily inflate the file size. This will slow down deployments and increase execution time for cold activations. OpenWhisk also has a maximum size for action source code of 48MB.

Manually including individual site-packages folders, rather than the entire virtualenv directory, will ensure the archive file only contains packages being used. We must also add the Python script (virtualenv/bin/activate_this.py) executed by OpenWhisk to modify the module search path.

1
2
3
4
5
6
7
8
9
10
11
12
13
14
15
$ zip -r jokes_small.zip virtualenv/bin/activate_this.py virtualenv/lib/python3.6/site-packages/pyjokes __main__.py
updating: virtualenv/bin/activate_this.py (deflated 54%)
updating: virtualenv/lib/python3.6/site-packages/pyjokes/ (stored 0%)
updating: virtualenv/lib/python3.6/site-packages/pyjokes/__init__.py (deflated 20%)
updating: virtualenv/lib/python3.6/site-packages/pyjokes/jokes_de.py (deflated 29%)
updating: virtualenv/lib/python3.6/site-packages/pyjokes/jokes_en.py (deflated 61%)
updating: virtualenv/lib/python3.6/site-packages/pyjokes/jokes_es.py (deflated 40%)
updating: virtualenv/lib/python3.6/site-packages/pyjokes/pyjokes.py (deflated 68%)
updating: __main__.py (deflated 18%)
$ ls -lh
total 40984
-rw-r--r--  1 james  wheel    74B 21 Apr 11:01 __main__.py
-rw-r--r--  1 james  wheel    20M 21 Apr 11:07 jokes.zip
-rw-r--r--  1 james  wheel   9.3K 21 Apr 13:36 jokes_small.zip
drwxr-xr-x  6 james  wheel   204B 21 Apr 11:25 virtualenv

The archive file is now less than ten kilobytes! 🏃

With The Serverless Framework

The Serverless Framework is a popular open-source framework for building serverless applications. This framework handles the configuration, packaging and deployment of your serverless application.

OpenWhisk is supported through a provider plugin. Recent versions of the plugin added support for the Python runtime environment.

Using the application configuration file for the framework, users can add include and exclude parameters to control the contents of the archive file before deployment.

Here’s an example of the configuration needed to only include the necessary files for the application above.

1
2
3
4
5
6
7
8
9
10
11
12
13
14
15
16
17
18
service: pyjokes

provider:
  name: openwhisk
  runtime: python:3

functions:
  jokes:
    handler: handler.joke

plugins:
  - serverless-openwhisk

package:
  exclude:
    - virtualenv/**
    - '!virtualenv/bin/activate_this.py'
    - '!virtualenv/lib/python3.6/site-packages/pyjokes/**'

conclusion

Python has a huge community of third-party packages for everything from parsing JSON, making HTTP requests and even generating jokes. OpenWhisk already provided a number of the most popular packages within the Python runtime.

Users can install additional packages locally using the pip and virtualenv tools. Bundling those files within the deployment archive means they are extracted into the OpenWhisk Python runtime environment.

Recent changes to the Python runtime allows the platform to automatically add local package folders to the module search path.

This means Python functions running on OpenWhisk can now use any third-party library as if it was installed globally.

Hurrah 👌!

Building an SMS Bot for Slack.

This is smsbot.

It provides an integration with Slack that connects SMS messages into channels. People can text an external number and have their messages posted into the channel. Channel users can respond to the messages and have their response sent back to the sender using SMS.

smsbot was developed in under a few hours and less than one hundred lines of code using a serverless cloud platform.

Want to understand how it works? Let’s find out…

The first challenge was how to programmatically send and receive SMS messages.

Want to deploy smsbot yourself? Follow the instructions at the bottom or check out the Github repository.

Twilio

Twilio provides a platform for building SMS, voice and messaging applications using an API.

Developers can register phone numbers through the service that invoke webhooks for incoming calls and SMS messages. Webhooks are passed message details and return a custom markup language (TwilML) to encode the instructions on how to respond to the request.

The platform also provides a REST API to initiate phone calls and SMS messages.

We now have a way to handle text messages for our bot, how do we integrate a new bot in Slack?

Slack

Slack also provides a webhook-based mechanism to integrate custom bots into the platform. The platform has two different integrations…

Incoming Webhooks.

Provide a way to post messages into Slack from external sources. It provides a custom URL that supports HTTP requests with a JSON payload. These requests are turned into channel messages. The JSON payload is used to control the content and formatting of the message.

https://api.slack.com/incoming-webhooks

Outgoing Webhooks

Allow you to listen for messages in channels without using the full real-time API. Slack sends HTTP requests to registered URLs when specific trigger words appear in channel messages. The HTTP request body contains the message details.

https://api.slack.com/outgoing-webhooks

Now we just need a way to write simple HTTP services to listen for webhook requests…

OpenWhisk

OpenWhisk is an open-source serverless cloud platform. Serverless platforms make it easy to create microservices in the cloud without having to set up or manage any infrastructure.

Developers push their code directly into the platform. The platform will instantiate the runtime and invoke the code on-demand for each request. Serverless functions can be exposed as HTTP endpoints or connected to event sources like message queues or databases.

Serverless platforms make it easy to create simple HTTP services to handle webhook requests.

Web Actions

Web Actions are a new feature in OpenWhisk for exposing serverless functions as simple HTTP endpoints. Functions have access to the full HTTP request and can control the HTTP response returned. This method is suitable for simple public endpoints that do not need more enterprise features supported by the API gateway.

Web Actions are available at the following platform API path.

1
https://{APIHOST}/api/v1/experimental/web/{USER_NAMESPACE}/{PACKAGE}/{ACTION_NAME}.{TYPE}
  • APIHOST - platform endpoint e.g. openwhisk.ng.bluemix.net.
  • USER_NAMESPACE - must be explicit and cannot use the default namespace (_).
  • PACKAGE - action package or default.
  • ACTION_NAME - function identifier.
  • TYPE - .json, .html, .text or .http.

Example

Here’s a simple Web Actions that returns HTML content when invoked through the API.

1
2
3
4
5
6
7
8
function main(args) {
    var msg = "you didn&#39;t tell me who you are."
    if (args.name) {
        msg = `hello ${args.name}!`
    }
    return {body:
       `<html><body><h3><center>${msg}</center></h3></body></html>`}
}

Actions can be turned into web-accessible actions by setting a custom annotation.

1
$ wsk action create greeting source.js --annotation web-export true

The greeting function can then be invoked through a HTTP request to the following endpoint.

https://openwhisk.ng.bluemix.net/api/v1/experimental/web/user@host.com_dev/default/greeting.http?name=James

1
2
3
4
5
$ http post https://openwhisk.ng.bluemix.net/api/v1/experimental/web/user@host.com_dev/default/html_greeting.http?name=James
HTTP/1.1 200 OK
...

<html><body><h3><center>hello James!</center></h3></body></html>

Twilio <=> Slack

OpenWhisk Web Actions are a great solution for creating webhook endpoints. Connecting Twilio to Slack (and vice-versa) can be implemented using two different OpenWhisk Web Actions.

  • Twilio Webhook. Invoked for SMS messages. Uses the Slack Incoming Webhook to create a bot messages from content. ​
  • Slack Outgoing Webhook. Invoked for channel replies. Uses Twilio API to send replies as SMS messages.

Let’s have a look at the Twilio webhook first…

Twilio Webhook

When a new SMS message is received, we want to post this bot message into our Slack channel.

Twilio allows developers to configure webhooks for each registered phone number. The webhook endpoint will be invoked for each SMS message that is received. Twilio can either send a HTTP POST request, with parameters in the body, or a HTTP GET request, with URL query parameters.

OpenWhisk Web Actions support both formats. Request parameters will be available as properties on the function argument.

Here’s a simple Web Action that would log the message sender and content for each SMS received.

1
2
3
function main (params) {
  console.log(`Text message from ${params.From}: ${params.Body}`)
}

Creating Bot Messages From SMS

When an SMS message is received, we need to send a HTTP POST to the Incoming Webhook URL. The JSON body of the HTTP request is used to configure the channel message. Using the username, icon_emoji and and text properties allows us to customise our bot message.

OpenWhisk Actions in Node.js have numerous popular NPM modules pre-installed in the environment. This includes a HTTP client library. This code snippet demonstrates sending the HTTP request to create out bot message. The Slack Webhook URL is bound as a default parameter to the action.

1
2
3
4
5
6
7
8
9
10
11
12
13
14
15
16
17
18
19
20
const request = require('request')

const slack_message = text => ({
  username: 'smsbot',
  icon_emoji: ':phone:',
  text
})

function main (params) {
  return new Promise(function (resolve, reject) {
    request.post({
      body: slack_message(`Text message from ${params.From}: ${params.Body}`),
      json: true,
      url: params.slack.webhook
    }, err => {
      if (err) return reject(err);
      resolve();
    })
  })
}

Returning a Promise ensures the request is completed before the function exits.

Sending Acknowledgement Message

Returning TwilML content allows us to control the response from Twilio to the incoming message.

This snippet would send an SMS reply to sender with the content “Hello World!”.

1
2
3
4
<?xml version="1.0" encoding="UTF-8"?>
<Response>
  <Message>Hello World!</Message>
</Response>

Twilio’s client library for Node.js can be used to programatically generate TwilML.

1
2
3
const twilio = require('twilio')
const resp = new twilio.TwimlResponse()
const twilml = resp.message('Thanks for letting us know.').toString()

Returning XML content as the HTTP response requires us to set the response headers, body and status code in the Web Action.

1
2
3
4
5
6
7
8
9
10
function main () {
  const xml = '...'
  return {
    headers: {
      'Content-Type': 'text/xml'
    },
    code: 200,
    body: xml
  }
}

Web Action Source

Adding the XML response code into the existing function completes the OpenWhisk Web Action required to handle incoming SMS messages.

1
2
3
4
5
6
7
8
9
10
11
12
13
14
15
16
17
18
19
20
21
22
23
24
25
26
27
28
29
30
31
32
const request = require('request')
const twilio = require('twilio')

const resp = new twilio.TwimlResponse()
const twilml = resp.message('Thanks for letting us know.').toString()

const response = {
  headers: {
    'Content-Type': 'text/xml'
  },
  code: 200,
  body: twilml
}

const slack_message = text => ({
  username: 'smsbot',
  icon_emoji: ':phone:',
  text
})

function main (params) {
  return new Promise(function (resolve, reject) {
    request.post({
      body: slack_message(`Text message from ${params.From}: ${params.Body}`),
      json: true,
      url: params.slack.webhook
    }, err => {
      if (err) return reject(err);
      resolve(response);
    })
  })
}

Register Webhook

Once we have deployed the Web Action, we can configure the Twilio SMS webhook endpoint to use following URL.

https://openwhisk.ng.bluemix.net/api/v1/experimental/web/user@email.com_dev/default/smsbot-dev-incoming.http

Slack Outgoing Webhook

When someone sends a channel message to the bot, smsbot should send that content as an SMS message to the last person who sent an SMS to the channel. An Outgoing Webhook will be used to trigger the bot.

Outgoing Webhooks have a configurable trigger word. Channel messages which start with this word are send as HTTP requests to the list of URLs registered for that webhook. We will use smsbot as our trigger word.

Request Parameters

Slack sends the following parameters for each channel message.

1
2
3
4
5
6
7
8
9
10
token=XXXXXXXXXXXXXXXXXX
team_id=T0001
team_domain=example
channel_id=C2147483705
channel_name=test
timestamp=1355517523.000005
user_id=U2147483697
user_name=Steve
text=googlebot: What is the air-speed velocity of an unladen swallow?
trigger_word=googlebot:

In OpenWhisk Web Actions, these parameters will be available on the function argument object.

Here’s a simple Web Action that would parse and log the message contents when the webhook is fired.

1
2
3
4
function main (params) {
  const msg = params.text.slice(params.trigger_word.length + 1)
  console.log('channel message:', msg)
}

When this webhook is fired, we need to add code to send an SMS message with the channel message.

Sending SMS Messages

Twilio’s API allows us to programatically send SMS messages from our registered numbers.

This snippet shows you how to use their Node.js client library to send sample message.

1
2
3
4
5
6
7
8
9
10
const twilio = require('twilio')
const creds = { account: '...', auth: '...' }

const client = twilio(creds.account, creds.auth)
const callback = (err, message) => {
  if (err) return console.log(err)
  console.log('sent sms message.')
}

client.messages.create({ to: '...', from: '...', body: 'hello world' }, callback)

The webhook should use this client library to send a message to the last person who send us an incoming message.

Reply to Message Sender

How can we determine who was the last person who sent a message to our bot? The Web Action processing the incoming messages is a separate service to the Web Action sending SMS messages.

Rather than setting up a database to share application state, the service can use Twilio’s API to retrieve the received message details.

1
2
3
4
5
6
7
8
const twilio = require('twilio')
const creds = { account: '...', auth: '...' }
const client = twilio(creds.account, creds.auth)

client.messages.list({to: '+44....'}, (err, data) => {
  const last = data.messages[0]
  console.log(`last message from: ${last.from}`)
})

SMSBot Channel Response

Outgoing Webhooks which respond with a JSON body will generate a new channel message.

1
2
3
4
5
{
  "username": "smsbot",
  "icon_emoji": ":phone:",
  "text": "sms sent to ..."
}

Web Action Source

Combing the channel message parsing code with the snippets for sending SMS messages and obtaining the last message sender completes the Web Action needed to handle the Outgoing Webhook.

1
2
3
4
5
6
7
8
9
10
11
12
13
14
15
16
17
18
19
20
21
22
23
24
const twilio = require('twilio')

const slack_message = text => ({
  username: 'smsbot',
  icon_emoji: ':phone:',
  text
})

function reply (params) {
  const client = twilio(params.twilio.account, params.twilio.auth)
  return new Promise((resolve, reject) => {
    client.messages.list({to: params.twilio.number}, (err, data) => {
    if (err) return Promise.reject(err)

    const last = data.messages[0]
    const msg = params.text.slice(params.trigger_word.length + 1)
    const options = { to: last.from, from: last.to, body: msg }
    client.messages.create(options, (err, message) => {
        if (err) return Promise.reject(err)
        resolve(slack_message(`sms reply sent to ${last.from}`))
      })
    })
  })
}

Twilio account credentials are bound as default parameters to the Web Action during deployment.

Deployment

smsbot is built using The Serverless Framework.

This framework makes building serverless applications really easy. The tool handles the entire configuration and deployment process for your serverless provider. OpenWhisk recently released integration with the framework through a provider plugin.

Let’s look at how to use the framework to deploy our serverless application…

OpenWhisk

Register for an account with an OpenWhisk provider, e.g. IBM Bluemix.

Set up the wsk CLI and run the command to authenticate against the platform endpoint.

1
wsk property set --apihost openwhisk.ng.bluemix.net --auth SECRET

Serverless Framework

Install the The Serverless Framework and the OpenWhisk provider plugin.

1
npm install --global serverless serverless-openwhisk

Source Code

Download the source code from Github and install the project dependencies.

1
2
3
$ git clone https://github.com/ibmets/smsbot.git
$ cd smsbot
$ npm install

Create a new file called credentials.yml with the following content.

1
2
3
4
5
6
7
twilio:
    account:
    auth:
    number:
numbers:
slack:
    webhook:

Twilio

Register an account with Twilio and provision a new phone number. Make a note of the phone number. Retrieve the account identifier and auth token from the Twilio console.

Fill in the account identifier, auth token and phone number in the credentials.yml file.

1
2
3
4
twilio:
    account: AC_USER_ID
    auth: AUTH_TOKEN
    number: '+441234567890'

Important: the twilio.number property value must be a quoted string.

Phone Numbers

During Twilio’s free trial, you will need manually verify each phone number that you want to send messages to.

Fill in all verified numbers in credentials.yml.

1
2
3
numbers:
    '+441234567890': Joe Smith
    '+441234567891': Jane Smith

Important: the numbers property values must be a quoted strings.

Incoming Webhook

Create a new Incoming Webhook integration for the Slack channel messages should appear in.

Fill in the slack.webhook property in credentials.yml with this url.

1
2
slack:
    webhook: https://hooks.slack.com/services/XXXX/YYYY/ZZZZ

Deploy Application

Use The Serverless Framework to deploy your application.

1
2
3
4
5
6
7
8
9
10
11
12
13
14
15
16
17
18
19
20
21
22
23
24
25
$ serverless deploy
Serverless: Packaging service...
Serverless: Compiling Functions...
Serverless: Compiling API Gateway definitions...
Serverless: Compiling Rules...
Serverless: Compiling Triggers & Feeds...
Serverless: Deploying Functions...
Serverless: Deployment successful!

Service Information
platform:   openwhisk.ng.bluemix.net
namespace:  _
service:    smsbot

actions:
smsbot-dev-incoming    smsbot-dev-reply

triggers:
**no triggers deployed**

rules:
**no rules deployed**

endpoints:
**no routes deployed**

Twilio Webhook

On the Phone Numbers page in the Twilio console, configure the ”Messaging” webhook URL.

Use this Web Action URL, replacing user@host.com_dev with your namespace.

https://openwhisk.ng.bluemix.net/api/v1/experimental/web/user@host.com_dev/default/smsbot-dev-incoming.http

Outgoing Webhook

Create a new Outgoing Webhook integration for the Slack channel messages should appear in. Use smsbot as the Trigger Word.

Use this Web Action URL, replacing user@host.com_dev with your namespace.

https://openwhisk.ng.bluemix.net/api/v1/experimental/web/user@host.com_dev/default/smsbot-dev-reply.json

Test it out!

Send a text message to the phone number you registered through Twilio. smsbot should post the contents into Slack and send an SMS response with the message ”Thanks for letting us know!”.

If you send a channel message starting with the trigger word (smsbot), the phone number should receive a new SMS message with the message text.

Awesome-sauce 😎.

Conclusions

OpenWhisk Web Actions provide a convenient way to expose serverless functions as simple HTTP APIs. This feature is ideal for implementing webhook endpoints.

Both Slack and Twilio provide webhook integration for developers to use their platforms. Using OpenWhisk Web Actions, we can write serverless functions that act as a bridge between these services. With less than a hundred lines of code, we’ve created a new slack bot that can connect users to channels using SMS messages.

Pretty cool, huh?! 👏👏👏

Openwhisk and the Serverless Framework

The Serverless Framework is the most popular open-source framework for building serverless applications.

Recent releases included support for using the framework with non-AWS providers. This feature makes it easier for developers to try different serverless platforms and move applications between providers.

Since last summer, I’ve been leading the technical effort to provide an OpenWhisk provider plugin for the framework.

OpenWhisk is the first non-AWS serverless provider to complete integration into the framework.

Getting Started

Documentation for the provider plugin is available on The Serverless Framework’s website.

Example projects using the framework to build applications for OpenWhisk are now available in this repository.

More details on the provider plugin can be found on the project repository.

Found an issue? Feature request? Need help? Please open issues on Github.

Video Demonstration

Serverless Meetup Presentation

Last week, I was invited to speak at the London’s Serverless Meetup about building multi-provider serverless applications using this feature.

Slides from the presentation are here:

There is a (low-fi) video recording from the event here:

Watch live video from serverlessldn on www.twitch.tv